Tuesday, June 14, 2011

International Yarn Bombing Day

...What a group effort!


This year held the first annual International Yarn Bombing Day on June 11, 2011. My knitting group, the Eugene Knotty Knitters decided to yarn bomb a bicycle and pedestrian bridge in Eugene, Oregon. There were so many great pieces. I've said it before, but I am in so much love with my crafty friends. Their art is so inspiring!


You can read more about our yarn bombing at The Knotty Knitters blog. And I was a guest blogger for Yarnbombing.com.


My contributions to the bridge were a few railing cozies, a pom pom garland and a loooooooong cozy for the bridge that measured 42 feet. After we added the other cozies, it was over 50 feet in length. Amazing!


Tuesday, May 31, 2011

Bolder Boulder

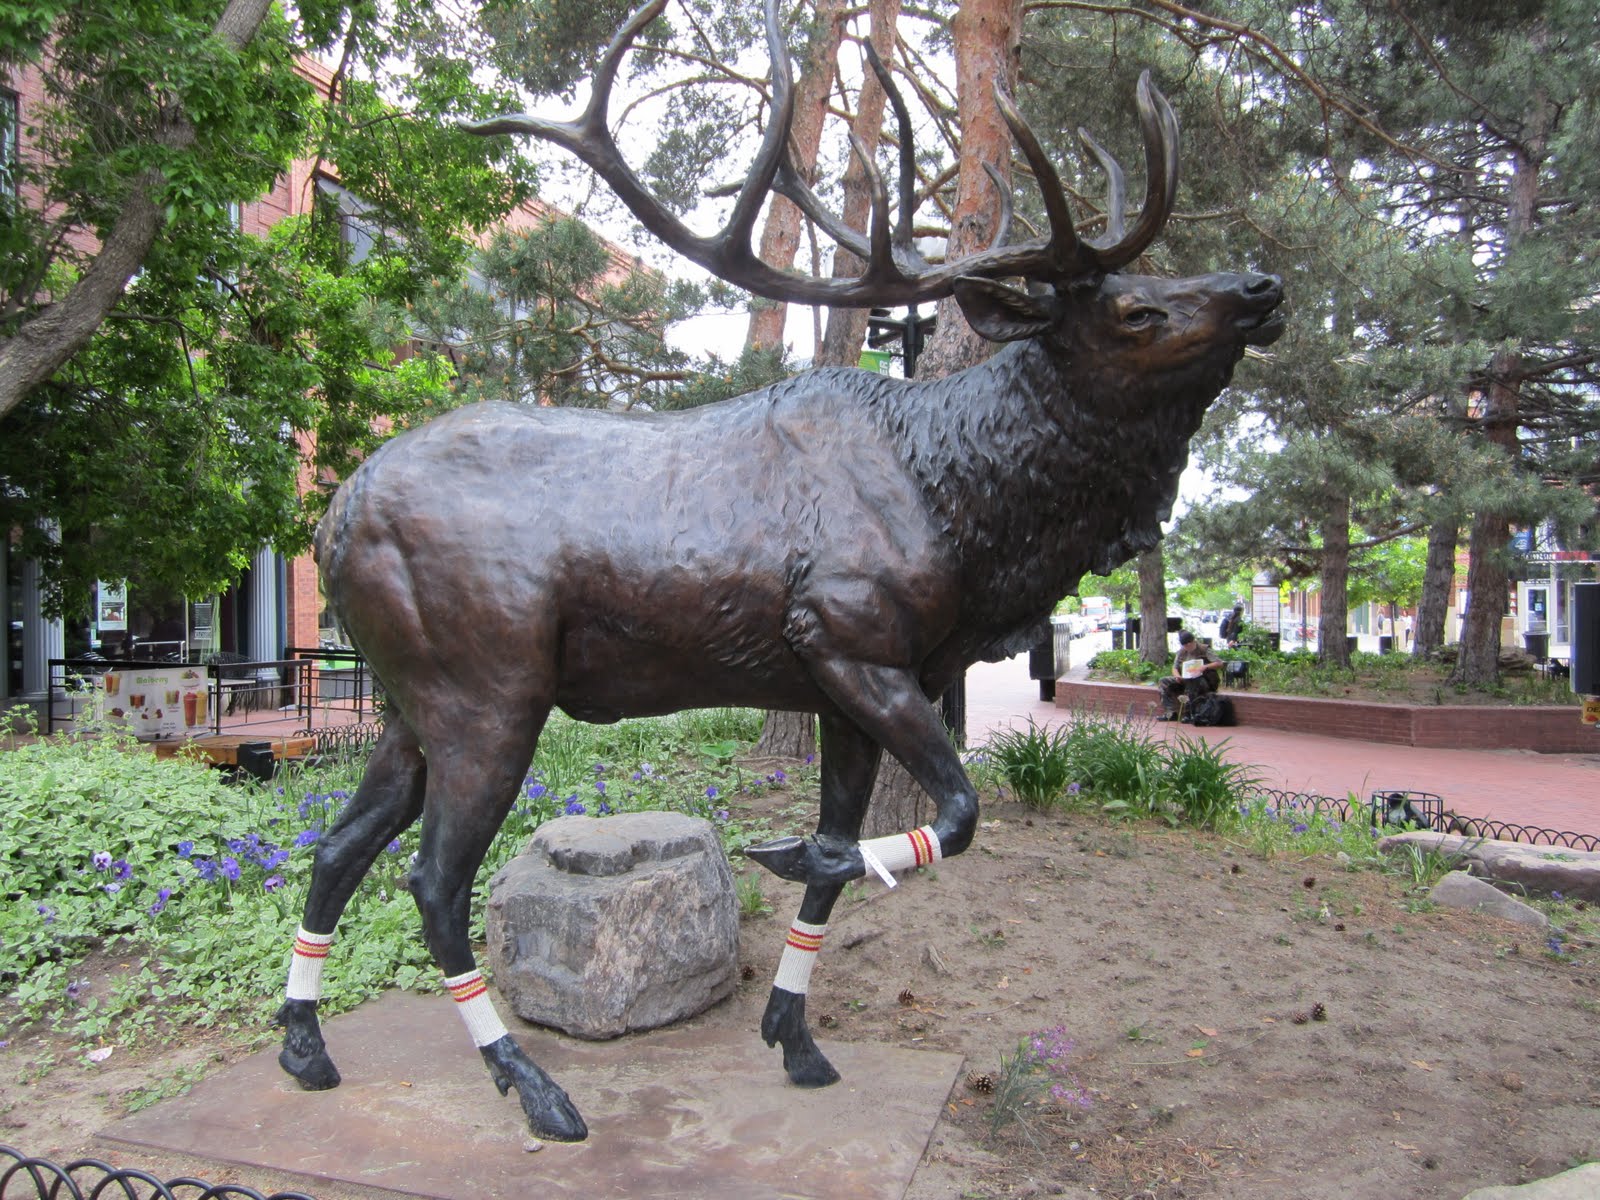
This past Memorial Day weekend I visited my sister who lives outside of Boulder, Colorado. I knew I wanted to yarn bomb something in Boulder so I looked on online. I came across this "Bull Elk" statue by Jim Agius. I thought it would be great to knit the Elk leg warmers that looked like tube socks.Since I had never seen the statue personally I had to guess what size to make these leg wamers. Luckily they fit!

As I was installing them my sister remembered that the very next day in Boulder was a huge marathon! What amazing coincidence that my yarn bomb worked really well with the neighborhood theme that weekend!

Happy to help this elk get ready to run in the Bolder Boulder.


Tuesday, May 17, 2011

Stash Buster

... what would you have found?

Finding your parents' stash. What does that mean to you? Did you come across your dad's old Playboy collection? Did you find their bag of pot and rolling papers? Or was it something as innocent as finding your hidden Christmas presents?

For knitters, it's something quite different. A stash is the collection of yarn knitters have.

As you can see, my little boy has indeed "found" my stash.

Monday, April 25, 2011

Dyeing Easter Eggs

...naturally.

You'd think with all the food coloring I have in the house to dye yarn with I'd be set to dye eggs for Easter this year. However I saw an article by Peaceful Parenting about dyeing eggs with natural dyes. Dyes from fruits, vegetables and spices. That sounded like a lot of fun!


Clockwise from top:
beets
paprika
blueberries
spinach
coffee
turmeric
cherries
red cabbage in the middle

All of the dyes I added a tablespoon of white vinegar to except the coffee. And I let the eggs sit in the dye for an hour.

The coffee dye was just strong brewed coffee.

The beets and red cabbage I bought fresh and chopped it up. The spinach I bought frozen. I put them in a pan with enough water to cover and brought to boil. Once it started boiling, I turned off the heat and let it sit for 15 minutes then I strained out the vegetables (the beets we ate while waiting for the eggs to dye. Yum!)

The blueberries and cherries I also bought frozen. I thawed them and mashed them up. I added a cup of boiling water and stirred.

For the paprika and turmeric, I added 1/8 cup of spices to two cups boiling water. The spices don't disolve so when it was time to take the eggs out, you have to wipe them down a bit to remove the powder.

My kiddos had fun asking what the different dyes were from and I think we'll continue to do this every year. I want to try dyeing with onion skins next time and a friend of mine dyed hers with black currant and her eggs came out stunning. If you've tried a different natural dye with great results, I'd love to hear about it.

Wednesday, April 13, 2011

Little Lego Man

...Cowboy up!

Yesterday I posted on Facebook that I had a hankering to do miniature knitting again. I played around with it last year and found it frustrating yet fascinating. Katie Aaberg challenged me to knit a sweater for a lego man. Challenge accepted!


Did I succeed? You decide. I couldn't knit him a sweater after all because the little lego arms are tight against their little lego bodies making it impossible to get them through sleeves. I then went for a sweater vest look but ended up making it too big. And the tight arms bunches the knitting around. I think it looks like he's wearing a poncho. In my opinion, it works out great since he's a cowboy and all.

Just to give you a scale on how small miniature knitting is, this photo shows my miniature needles up against size US 1 or 2.25mm.


Name: Little Lego Man
Pattern: my own design
Yarn: 3 strands of DMC 6 strand embroidery floss
Needles: 7/0 or .65mm
Gauge: 19sts= 1 inch and 23 rows= 1 inch

Tuesday, April 12, 2011

I Feel Pretty

...dinosaurs lookin' fine.


My Monday night SnB is held at Laughing Planet where they have toy dinosaurs on each table to play with. I can't believe I didn't think of it earlier, but it dawned on me to knit them clothes.

Parasaurolophus got the hipster hat.


Pachycephalosaurus needed some boxing gloves.


Ankylosarus wanted a shredded sweater to go over his spikes.


Stegosaurus loved her handspun 80s inspiried leg warmers.


Triceratops looks darling in her new sparkly pink bonnet!


Scelidosarus needed spikes to continue down his tail.


Brachiosaurus got a nice ruffle cowl.


Photos by Katie Aaberg.

Sunday, April 3, 2011

Recycled Sweater Project Part 2

... lots of yarn, still just the one sweater.


I recently posted about using a used thrift store sweater to make yarn for yourself- Recycled, Upcycled Sweater. I had knit my son Bailey a sweater after taking apart the used sweater, dyeing it and reknit. His sweater took only the yarn from the front and back of the sweater and I still had enough leftover to make myself some leg warmers.

I took the sleeves off of the original sweater and set them aside for another project. A project I call Friendship Bonnets made for two awesome little girls Molly and Lydia. Instead of unraveling the yarn from the sleeves, I left whole. After hand washing them and soaking them in vinegar water I placed them on a layer of cling wrap. I mixed my food coloring with more vinegar water and used a squirt bottle to squirt stripes onto the sleeves. I used Wiltons black, red and royal blue. After I applied the dye, I added another sheet of cling wrap, rolled it up and microwaved it until the color was all absorbed. I then layed it out to dry.


The great thing about leaving the sleeves whole is when it was time to knit, I could just unravel the sleeve as I went. I didn't have to wind it into a skein or ball. You can buy something similar called a sock blank- a preknitted sheet of wool that you can dye then simply unravel to knit socks.

Each sleeve made one bonnet with no leftover yarn. The pattern is something I came up with on the spot.

There's a phenomenon that occurs (sometimes) with food coloring. It breaks. That means that all the colors that are in the dye separate. The black broke into a brown and green and the royal blue broke into blue, purple and a bit of pink. I think it looks great!

So with one $4.99 thrift store sweater, I was able to make one sweater, two hats and a pair of legwarmers! That's really cool.

Name: Friendship Bonnets
Yarn: recycled, upcycled thrift store sweater yarn
Weight: super bulky
Pattern: my own

Monday, March 28, 2011

Recycled, Upcycled Sweater

...lots of yarn for very little!


If you're like me and buy yarn as if sheep were going extinct, you know that your yarn bill adds up. Very quickly. A great way to get a lot of yarn is by going to the thrift store! While some thrift shops do sell yarn that people have donated, I'm talking about buying a sweater, taking it apart and reusing the yarn for your project! It's cheap. It's awesome. It's a load of fun! Lemme break it down.

In my case here, I knew I wanted yarn I would be able to dye with food coloring. To dye with food coloring or Kool Aid, you have to have it made out of wool of some sort. The higher the wool content the better. Cotton and man made fibers like acrylic do not take dyes very well (I should clarify- cotton does not take food dyes very well.) This sweater here I bought for $4.99 and is 50% wool, 50% acrylic.


The second thing you want to look at in a possible sweater are the seams. Go ahead and turn it inside out. What do you see? If the seams are sewn together like this, then you're golden! That means each piece was knitted then put together with a chain stitch.

However, if you find a sweater that was sewn together with a serger skip it! A serger cuts the yarn while it sews it together. That means that instead of having one long continuous piece of yarn you're unraveling, each row of knitting will be it's own separate string. You'd end up with hundreds of yard long pieces of yarn. Not very useful for knitting.

So now you have to wash your sweater. I hand wash them with some wool wash. You can wash it as it is- in one big piece before you've taken it apart. You can take the sweater apart, wash those separately or you can do what I like to do. After I've taken it apart, unraveled it and skeined it I wash it just prior to dyeing. When you dye yarn, you want the yarn wet. So washing it right before makes sense to me.

Taking the sweater apart is fun but can also be time consuming. I like using a seam ripper. If you look at the chain stitch that sewed the sweater together, you'll notice that it looks like a bunch of arrows on top of each other. If you cut the thread at the top of the arrows, you'll be able to just pull it and it'll unravel the entire seam (think of it like dog or cat food- some bags have that same sort of chain stitch closure when you first buy it.) If you can get that chain stitch undone, it'll save you lots of time!


With this sweater, I am planning on using the sleeves for a different project so I put them aside and just started unraveling the front and back pieces. You can wind it into a ball, wind it onto a niddy noddy (which I do) or wind it around anything else- back of a chair?


My four year old son wanted a blue sweater, so I knew I'd be dyeing this yarn. I had him pick out the colors. He chose Wilton's teal, royal blue and kelly green food coloring. I used the pan method and heated it in the microwave. After I skeined and tied my yarn (to prevent tangles!) I washed it and then soaked it in vinegar water. I gently squeezed out the water and layed it in my casserole dish. I dissolved each food dye into some vinegar water and poured it on top.

Left to right: royal blue, kelly green, teal.

I then microwaved it a few minutes at a time until the water was clear. I pulled out the yarn, let it cool then squeezed out the water and let it dry. I did this will all the skeins of yarn I would be using.

I found this great pattern for a top down, seamless raglan sweater. Fits anybody, any size with any yarn. You knit a swatch, plug in your numbers, do the math and now you have a sweater pattern! It worked great! After I finished knitting Bailey's sweater, I still had enough of the yarn to knit myself leg warmers. And don't forget I still have those two sleeves! All that yarn. For less than $5! Such a deal!

Name: Bailey Blue Sweater
Yarn: recycled, upcycled thrift store sweater yarn
Weight: super bulky
Pattern: The Magic Custom Fit Raglan Sweater by At My Mothers Knee